Saturday, April 05, 2008

Potato Masher #2


When I'm not cooking, I'm painting. This is Potato Masher #2 from http://www.susangainen-nanoscapes.com/ .

Sunday, March 30, 2008

Spicy Roasted Peanuts: bet you can't eat just one!

http://www.jld.net/Last week one of my colleagues, Mike Bloyer, brought in a small bowl of peanuts -- some that he'd spared from a Spanish Class project. Move over banned substances! These Spicy Peanuts will grab your palate and grab your brain -- in a good way. Using a (surprise!) crock pot, they are easy to make. And peanuts are cheap.

Cayenne and chili powder give the nuts their heat. Thyme doesn't read as "thyme," but gives an exotic, elusive vegetal taste. The brown sugar rounds out all of the flavors. Bonus for hosts: You may freeze these nuts for a week.

(Extemely adapted from "Ragin' Cajun Pecans" from Fresh from the Vegetarian Slow Cooker: 200 recipes for healthy and hearty one-pot meals that are ready when you are, Robin Robertson, Harvard Common Press, Boston 2004, p. 25.)

Michael's Spicy Roasted Peanuts

2-1/2 pounds blanched peanuts (Roasted, salted peanuts are a fine substitute)
1/4 c olive oil (any good tasting olive oil; designer oil not required)
1/2 -1 tsp cayenne
1 T fresh ground black pepper
2T chili powder (pure chili, please, not chili powder with salt)
1 T dried thyme
1/2 c brown sugar
1 T salt, plus more after roasting

1. Combine the peanuts and oil in a slow cooker. Cover and cook on high for 15 minutes. Because my elderly-$5-in-a-garage-sale slow cookers have only exuberant “High Heat,” I used a Nesco Roaster with a “slow cooker” setting.

2. Combine the spices, sugar and salt in a small bowl. Add them to the peanuts. Stir well. Cover and cook on low for 2-1/2 hours. Stir occasionally – every 30 minutes or so.

3. After 2-1/2 hours, add an additional 2 tsp of salt. Remove the peanuts to a parchment covered baking sheet to cool.

Wednesday, March 12, 2008

Pecan Bourbon Caramel Cake: Minnesota Justice Foundation's Official Birthday Cake

The winner, and still champion: Pecan Bourbon Caramel Cake.

Minnesota Justice Foundation Update: I have hosted a birthday party fundraiser for Minnesota Justice Foundation for the past two years, and my friends and family have generously supported a fund named in honor of my parents, Hal and Letty Gainen, who would be enthusiastic MJF supporters today. During the past year, that fund has helped MJF’s Assisted Pro Se Clinics in Greater Minnesota.

Note to non-lawyers: When you represent yourself in court, you are a “pro se” litigant. Students providing “Assisted pro se” services advise -- but do not represent -- clients.
Note to Non-Minnesotans: “Greater Minnesota” is outside the Minneapolis-St. Paul Metro area, which, depending on who defines the metro, can be 7, 11 or 14 counties.

Each year, MJF partners with several greater Minnesota legal services agencies to run assisted pro se clinics for clients with family law issues. This year, students from all four Minnesota law schools went to White Earth Reservation, to the Shoemaker and Ziegler firm in Detroit Lakes, and to the Legal Services of Northwest Minnesota offices in Bemidji. In addition to the trip up north, a clinic was held with Central Minnesota Legal Services in Little Falls, and more clinics are planned for Mankato and Willmar later this semester. MJF understands the need for increased pro bono services in all areas of the state, and is hoping to partner with more legal services agencies and private firms willing to assist pro se clients in better understanding their cases and the court system.

And now, without further adieu, I give you
MJF’s Official Birthday Cake: Pecan Bourbon Caramel Cake!

The original idea comes from Bill Neal’s classic
Biscuits, Spoonbread and Sweet Potato Pie: 300 recipes that celebrate the glories of Southern Baking (Alfred A. Knopf, 1991). Neal’s "Pecan Cake with Caramel Icing" has light layers with what he calls “the South’s most beloved icing, caramel.” He describes the cake as the favorite of an 80-year old Southern lady who had the same birthday party and cake for her entire life. A terrific endorsement.

In early 2007, my long-suffering colleagues at the University of Minnesota Law School Career and Professional Development Center endured several versions of this cake as I searched for one that wasn’t too dry and still had pecan flavor. That cake won the first MJF Birthday Cake Smackdown, beating the beloved
Jimmy Buffett Cake (butter rum cake, Key Lime Italian Meringue and toasted coconut). However, the first Pecan Cake was more complex than I prefer for a cake that I will make often: separating and beating egg whites, and using three cake pans is too much trouble. Ultimately, Neal’s “light layers” didn’t quite work for the way I like to bake.

Problem solved
. This year I found a Pecan Pound Cake that is an easy recipe for anyone with a stand mixer and, for the caramel, a candy thermometer. (Why don’t YOU have one?) And, once again, this cake was the hands’ down winner of MJF’s Birthday Cake Smackdown, trouncing the Judith Olney Joy of Chocolate Pound Cake.
Over the top alert: If you have Spiced Pecans in your freezer, this cake will be even better.

Construct this cake in three steps:

Make a pecan pound cake
Make a bourbon syrup
Make caramel for frosting

Useful tools:

A tube pan
A sifter or strainer
A metal cooling rack
A full sheet pan to put under the rack to catch the Bourbon Syrup Drips
A silicon brush as a “Bourbon Syrup Delivery System”
A candy thermometer
A silicon spatula to spread the caramel

PECAN POUND CAKE

Adapted from Georgia Pound Cake from Dinner at Miss Lady’s: Memories and Recipes from A Southern Childhood (Luann Landon, Algonquin Books of Chapel Hill, 1999.)

3 sticks butter, room temperature

1 cup pecans, toasted and chopped
1 pound dark brown sugar
1 cup white sugar
5 large eggs, room temperature
1 tsp vanilla
3 cups flour
½ tsp baking powder
½ tsp salt
1 cup whole milk, room temperature

1. Preheat the oven to 325. Butter and flour a tube pan.
2. Toast the pecans while the oven pre-heats. They’ll be toasted when you can smell them. Chop them fine – but not pulverized to dust.
3. Sift the flour, baking powder and salt. Purists will sift three times. Why not? If you don’t have a sifter, use a strainer. I have an electric sifter, and I swear by it.
4. Cream the butter. Add the sugars and beat at medium high speed for 5 minutes.
5. Slow the mixer and add the eggs, one at a time, beating briefly after each one. Add the vanilla. Scrape down the sides of the bowl. Why? So that you won’t have blobs of unmixed batter at the end.
6. Add the flour in three batches alternating with the milk. Add the pecans and beat briefly.
7. Pour into the pan. Bake for 80 minutes. It is done when a skewer comes out clean and the cake begins to pull away from the sides.
8. Cool in the pan on a rack for 20 minutes. Remove from the pan and cool on a rack.
9. To cut the cake into three layers, use a serrated knife and mark the cake in thirds all around. Then, cut the cake into three lawyers. I promise that this is easier than you think, and when covered with caramel, no one will know or care if the layers aren’t mathematically perfect. Put the layers on a rack in a sheet to catch the Bourbon Syrup drips.

BOURBON SYRUP
(adapted from Biscuits, Spoonbread)

1-1/2 cups water

1-1/2 cups white sugar
¾ cups bourbon

Boil the water and sugar for 5 minutes. Cool. Add the bourbon. Pour over the three cake layers. A silicon brush is very useful for this.


CARAMEL FROSTING
(adapted from Biscuits, Spoonbread)
4 cups brown sugar

2 cups heavy cream
1/8 tsp salt
6 T light corn syrup
12 T cold butter, cut into tablespoons

Put the brown sugar, cream, salt and corn syrup in a deep and heavy pan. Bring to a boil over high heat and cook to 240 degrees. Remove from heat and cool to 110 degrees without stirring. Add the butter 1 or 2 tablespoons at a time, beating vigorously until the caramel is a room temperature.


CONSTRUCT THE CAKE


1. Put your cake plate in the sheet pan to catch the caramel drips.
2. Lay the bottom third of your cake onto the cake plate. If you are obsessed about tidiness, put wax paper strips under the cake to catch the drips for a clean presentation. Or, go wild and let the drips fall where they may.
3. Pour slightly less than 1/3 of the caramel on the bottom third of the cake. Spread it around.
Repeat with the second layer. Spread the remaining caramel over the top and let it drip down the sides.


Thursday, December 27, 2007

Mushroom Soup: not from a can

If you are lucky enough to live in a city with the Palomino* restaurant chain, go forthwith and have a bowl of Portobella Mushroom Soup. If you love mushrooms with Hobbit-like passion, you will want to march into the kitchen and abscond with gallons, or, as I once suggested, "You may want to swim in it." As a professional career advisor, I can tell you that neither is a good career move, and it will be just your luck to have a cadre of U-Tubers on site at this critical moment in your life.

Another option is to go home and make your own. My favorite is based on "Hearty Mushroom Soup" from Mark Peel and Nancy Silverton At Home: Two chefs cook for family & friends (Warner Books, 1994, p. 79-80). I have taken two approaches to this soup, and both play on the soup's intense flavor. One is broth-like, and one is very dense, almost like a sauce. Your choice, of course.

For those days when chopping onion or mincing garlic is either unthinkable or impossible, please substitute good quality dried onion and garlic. "Good quality" does not mean the crumbs and dust that have been in your pantry for five years.


Mushroom Soup #1 -- not from a can

1 oz. dried mushrooms (half dried shitakes, half other dried mushrooms -- most recently I used 1/2 oz. porcini)
3 T butter
3 T. flour
1 small onion, finely chopped [or 2T Penzey's dried minced onions]
4 cloves garlic, minced [or 1 tsp Penzey's dried minced garlic]
1 to 1-1/2 pounds white button mushrooms thinly sliced
4-8 oz. crimini or portobello mushrooms, thinly sliced
1/2 tsp salt
1/2 tsp fresh ground pepper
1 tsp dried thyme
1/2 tsp dried marjoram (or oregano)
4 c. hot beef broth (Penzey's Beef Soup Base, for instance)
2-4 c. hot water

1. Soak the dried mushrooms in hot water. I put the mushrooms in a bowl , microwave for two minutes, and let them sit and soak for 10 minutes. Pour off the water. If you are very diligent, pour the water through a coffee filter and add it to the soup with the beef broth in Step 3.

2. In a large soup pot or dutch oven, melt the butter until the foam subsides, and then add the flour, stirring for about two minutes until you have created a smooth paste. Add the onion, garlic, and fresh mushrooms, stirring until the mushrooms release their liquid (five minutes). Lower the heat and add the salt, pepper, dried mushrooms, thyme, and marjoram (or oregano). Cook until all of the mushrooms are soft, stirring often. (five minutes)

3. Add the hot broth slowly, stirring to make sure that you have no lumps. Add the water, cover and simmer for 90 minutes, or until the dried mushrooms are tender.

4. Serve with a garnish of chives. A good host will offer guests the chance to add a teaspoon or so of Sherry at the table.

Thicker Mushrooms Soup -- Not from a can

Make the following addition:

In step 3: While the soup is simmering, make a very dark blond roux. Melt 4 T butter and then add 4 T flour. Stir carefully for about 30 minutes, or until the roux is very dark golden brown, or until you get tired of this activity. Add 1/2 cup soup at a time to the roux, to a total of 2 cups. With 30 minutes of simmering time remaining, slowly whisk the roux into the soup. The goal is a nicely thickened liquid. Keep the heat on very low, keep stirring and watch for sticking.

Leftover Mushroom Soup

Not that you'll have much to work with, but:

1. Heat the leftover soup in a saucepan or in a casserole dish in the microwave. Add thin-sliced raw russet or Yukon Gold potatoes and bake at 375 until the liquid is absorbed and the potatoes are tender. (60-90 minutes)

2. Use thick soup as mushroom sauce on steak or burgers, mushroom omelets or on vegetables.


*Palomino cities as of 6/4/10: Cincinnati, Dallas, Indianapolis, Minneapolis.


Saturday, November 24, 2007

Lazy Person's Stuffed Cabbage

Aunt Gussie Malovany's Stuffed Cabbage is legendary, and for good reason. She makes it with love and she loves to know that her family and friends are eating it. She has diligently and lovingly stuffed those cabbage leaves -- one by one -- for decades. I stand second to none in my admiration for those rolls, but I have always known that they were out of my league.

My Mother, Letty Gainen, was a terrific cook -- until she tired of the whole exercise. She left behind the Beth Torah Synagogue Cookbook, A Cook for All Seasons (1977), which includes Blintz Casserole (featured at the annual "Latkapalooza), and a host of other treasures, but no index. When it gets cold and I need comfort food, I turn to her best pal Lil Litowsky's "Sweet & Sour Meat With Cabbage," which covers all of the stuffed cabbage flavor and texture territory, but not one cabbage leaf gets stuffed.


Never one to leave flavors alone, I have updated Lil’s original with hot peppers, raisins and rice. The “red ingredient” was originally ketchup. Mom used “1890 Salad Dressing,” which is no longer available. I’ve used French’s Catalina Free, a can of Rotel, tomato sauce with lots of hot sauce and chili sauce. I don’t think it matters much in the end.

Lazy stuffed cabbage

1 pound ground beef (or turkey, chicken, or meat substitute)
1 onion, coarsely chopped
1 green or red bell pepper, coarsely chopped
4 jalapeno or other hot peppers, minced
1 cup of "red stuff" of your choice
1 cup of water (or more, depending on the rice you choose)
1 cup of whole grain rice (not instant)
2 T brown sugar
2 T cider vinegar
1/2 to 3/4 tsp ground cloves
1 bay leave
1 cup of raisins
5 cups of cabbage, coarsely sliced
juice of a lemon

1. Brown the onion and peppers in a large frying pan with a lid or a Dutch oven. Add the meat or meat substitute, break it up and brown it. Drain the fat.
2. Add the "red stuff" of your choice, water, vinegar, sugar, cloves, bay leave and raisins. Blend well.
3. Put the cabbage on top of the meat mixture, cover and simmer 30 minutes, or until the rice is cooked. Check on the mixture after 15 minutes. Add water if the mixture looks sticky and the rice is crunchy.
4. Add the lemon juice before serving.

This is even better the next day, and it freezes very well.

Sunday, September 30, 2007

Mom's Chicken Creole - 30 years later

Thirty years ago I lost the cookbook from which my mother made her iconic Chicken Creole. Last Thursday, after decades of searching, I found a copy in perfect condition at Opposable Thumbs, a wonderful used bookstore in Northeast Minneapolis.

If you or your mother or grandmothers have any "old" cookbooks or church or synagogue cookbooks, you probably have one or more of the 60-odd-page pamphlets published by the Culinary Arts Institute of Chicago in the '50s, '60s and '70s. During my decades-long hunt for "Tempting Low-Calorie Recipes," I have always found a way to sort through pamphlets and church cookbooks on the dusty bottom shelves of used bookstores coast-to-coast. If you imagine that I have lots of Culinary Arts books, you are correct.

My sister Elaine and I agree that Mom had either 1956 or 1965 edition, because this was a favorite family recipe from the 1960s. As was typical of our semi-adventurous mother, on the first time out she followed the recipe precisely, using an 1/8 tsp of cayenne. In our family's early '60s culinary sensibility, that much cayenne made the dish completely inedible. But, because the underlying idea was sound, she kept making it. Elaine and I agree that the original can of cayenne lasted for 10 or 15 years, because Mom doled out cayenne grain-by-grain thereafter.


I have adapted this considerably, substituting fresh mushrooms for canned, adding fresh hot peppers and garlic, and substituting Penzey's Chicken Paste for the odious bouillon cubes that Mom used instead of chicken stock. Feel free to substitute vegetarian stock and to replace the chicken with shrimp or tofu (instructions below). And yes, the Creole sauce is just fine all by itself. This goes best over rice.

New Chicken Creole, adapted from "Tempting Low-Calorie Recipes," Culinary Arts Institute

1 T canola or other neutral oil
4-6 oz fresh mushrooms, cut in thick slices
1 medium onion, chopped (not fine)
1 red or green pepper, cut in 1/2" strips
1 each, jalapeno and red fresno chili or other fresh chilis, minced
1 garlic clove minced
1 cup chicken or vegetarian broth
1 6 oz can of tomato paste and 6 oz water
1/2 tsp salt
1/2 - 1 tsp fresh ground pepper
1/8 tsp cayenne pepper
Choice of : 1 cup cut up cooked chicken, 1/2 pound raw peeled shrimp (or cooked shrimp), 1/2 pound tofu cut into cubes

1. Heat the oil in a large non-stick skillet with a lid. On high heat, add the mushrooms and peppers and stir until the mushrooms begin to brown. Add the onions and stir until they just begin to soften. Add the garlic and stir for a minute or until it becomes fragrant.

2. Add the broth, tomato paste and water, salt, pepper and cayenne. Stir until the tomato paste begins to dissolve. Lower the heat, and simmer covered for 30 minutes.

3. FOR CHICKEN: Add the chicken to the skillet and cook until heated (2-3 minutes).

4. FOR RAW SHRIMP: Add the shrimp and cook for two to five minutes, or until the shrimp is cooked. FOR COOKED SHRIMP: Add the shrimp and cook until heated. (2-3 minutes)

5. FOR TOFU: While the sauce is simmering, heat the broiler, cut the tofu into cubes, and place them on an oiled foil-covered baking sheet. Sprinkle with some red wine or red wine garlic vinegar for some color and flavor. Broil for about 8 minutes, turn the cubes and broil for about 5 more minutes, or until the cubes have some color and are beginning to crisp. Drain the cubes on a paper towel and then add to the sauce. Cook for 2-3 minutes so that the tofu can absorb some flavor.

Monday, August 13, 2007

Spiced Cherries Two Ways

Jam-making, for me, is an unalloyed pleasure. Start with fruit, add sugar, ginger (often in many forms), the occasional chili and lemon or lime juice, boil a few jars, stir for a while, and then -- it's JAM.

I owe this gentle obsession to two friends: Eileen O'Toole, who has been my friend since we worked on The Diamondback (the U of Maryland's newspaper) in college; and Laurie Colwin, who I never "knew," but whose cooking essays have made her feel like a friend. In Eileen's kitchen, I watched cherries from her tree become jam, and I was trusted with wiping the jars; in More Home Cooking, I learned about the quiet pleasure of making plum jam, the magic of corn relish, and the delight that comes from winning a prize at the fair (county fair in her case; Minnesota State Fair for me).

I got serious about making jam, relish and barbecue sauce just after 9/11. When the going got tough, I started to make jam in earnest. Case after case of jam. There have been years since 9/11 when I had two or three cases of empty jars in my car at all times -- just in case. Before jam season in 2007, I counted 36 cases of jars in my house. Just in case. My friends will not be surprised to know that the jam obsession has been partnered with a Jam-and-Preserving-Book Acquisition Project, and that they number 20, including a history of marmalade.

One treasure is Jeanne Lesem's The Pleasures of Preserving and Pickling (Knopf 1975). My copy is an official Chia Pet Book, because of its forest of sticky notes. Lesem guided me to perfecting Carrot Marmalade. For the past two years mine has looked beautiful, turned to stone when opened, which I now believe represented a serious misunderstanding of the physics of boiled sugar. Her recipe for Jamaican Banana Jam (p. 56) has simple but inspired ingredients (lime juice, bananas, sugar and water), and it makes a swell Peanut Butter and Banana Jam sandwich. Elvis might have liked it.

But her treatment of cherries is sublime: SPICED CHERRIES are whole cherries in a sweet and savory syrup. When I tasted leftover syrup after packing the first batch, I said "This is the best food I have ever made." There are two ways to approach making Spiced Cherries: with fresh or frozen cherries. Fresh cherries keep their shape better than frozen, but you can make this every day of the year with frozen cherries or strawberries and your dinner guests will love you, and the pancake-and-waffle crowd will be panting for more.

SPICED CHERRIES for the pantry (adapted from Pleasures of Preserving and Pickling)

2 pounds fresh, ripe cherries, pitted
3 c sugar
3/4 c red wine vinegar (the good stuff, please)
1/2 tsp ground mace
1/2 tsp ground cinnamon
1/8 tsp ground cloves
1 "coin" of fresh ginger (1/4 to 1/2 inch round)

1. Combine all of the ingredients except the cherries. Bring to a rapid boil. Boil for two minutes; add the cherries all at once. Continue at a low boil for about 40 minutes, or until the liquid has boiled down by half and the syrup is thick. Stir occasionally and keep watch: this is boiling sugar.
2. Pour into sterilized jars, process for 10 minutes.

SPICED CHERRIES for the refrigerator (will keep about a week, airtight and refrigerated) (adapted from Pleasures of Preserving and Pickling)

1 pound frozen dark cherries or 1 pound frozen strawberries (or a combination)
1/1-2 c sugar
3/8 c red wine vinegar
1/4 tsp ground mace
1/4 tsp ground cinnamon big pinch ground cloves
1 "coin" of fresh ginger (1/4 to 1/2 inch round)

1. Combine all of the ingredients except the cherries. Bring to a rapid boil. Add the cherries all at once. Continue at a low boil for about 40 minutes, or until the liquid has boiled down by half and the syrup is thick. If you are impatient, after about 15 minutes, remove 1 to 2 cups of the syrup and boil it separately. Return it to the pan and continue boiling and occasionally stirring.
2. Cool in a bowl and refrigerate, airtight, for about a week.

Friday, July 20, 2007

Laurie Colwin's "Katharine Hepburn" Brownies

Everyone has opinions about brownies -- cakey, squishy, dense, studded with random stuff. There are dozens of books with "brownie" in the title, and no self-respecting pastry-chef-author would write a cookbook without a brownie recipe. The Gold Standard -- the one from which you will learn everything you could possibly want to know about baking a brownie -- is Maida Heatter's two-pager which appears in Maida Heatter's Book of Great Chocolate Desserts (p 216-217, Alfred A. Knopf, 1981). All of her recipes are the equivalent of a day of baking school, and this one is no different.

The late Laurie Colwin's recipe is much more accessible. Her take on the recipe attributed to Katharine Hepburn appears in the classic More Home Cooking: A Writer Returns to the Kitchen (p. 75-76, HarperCollins, 1993). Her recipe has four simple steps, and you can mix the whole thing in a saucepan. If you like short, dense brownies, this is for you. My five-step version is similar to the original, but I have switched out bittersweet for unsweeted chocolate and added espresso powder. My colleagues loved them. You will, too.

Hepburn-Colwin Brownies (respectfully revised)

2 sticks (1/2 pound) unsalted butter
4 oz good bittersweet chocolate
½ tsp espresso powder
2 cups sugar
4 eggs, lightly beaten
1 tsp vanilla
½ cup all purpose flour
1 tsp salt

  1. Butter and flour a 13x9 pan. Preheat the oven to 325.
  2. Melt the butter and chocolate in a heavy saucepan. Stir often and don’t burn the chocolate. When the butter and chocolate are melted, take the pan off the heat and add the espresso powder.
  3. Add the sugar to the chocolate mixture. Stir until the mixture cools enough so that when you add the eggs they won’t scramble. Add the vanilla and stir until you can’t see any more egg.
  4. Stir in the flour and salt. Don’t beat this to death, but make sure that there are no flour streaks left. Pour into the prepared pan. Bake for 40 minutes or until a tester comes out clean. Watch carefully at the end – if your oven runs hot, you can have a scorched mess.
  5. Remove from the oven to cool on a rack. You will be amazed at how easy it will be to remove the cooled brownies neatly from the pan if you cut them while they are still hot.

Monday, June 18, 2007

Chocolate Celebration Cake: "599 Days to Go"

May 31, 2007 marked “599 days to go” for the Bush Presidency. In the spirit of an administration that has always ignored generic wisdom, conventional wisdom and facts-in-evidence, I created the “599 Day Cake.” The base, of course, is the well-known and loved Texas Sheet Cake.
For busy people with reasonably well-stocked pantries, it is quick, easy and low-tech, using a bowl, a wooden spoon, one small saucepan and a 9”x13” baking pan. It appears in hundreds of cookbooks, from community cookbooks to books by Famous Authors, and a quick Google search will uncover hundreds of versions.

But it is the "frosting" which embodied the purest Bush Administration spirit. Instead of using any of the time-honored methods of covering a chocolate cake, I chopped 8 ounces of very good dark chocolate in a mini-chopper with some cream. The theory – completely contrary to the laws of both Pastry and Physics – was that the heat of the chopper would create ganache, that most wondrous of all combinations of chocolate and cream. This method most certainly did not create ganache. The chocolate was barely chopped and the cream was curdled. Disgusting.

Continuing in the spirit of the Fact-Free Bush Administration, I posited that slathering the curdled chocolate onto the hot-out-of-the-oven cake would create ganache. Not so – again, the laws of Pastry and Physics won out. The chocolate mixture did, indeed, melt, but hardened into a something that looked like curdled granite. Looked weird; tasted good.

TEXAS SHEET CAKE (Adapted from The Dallas Junior League Cookbook, 1976, p. 332)

1 stick butter
4 T Dutch process cocoa (Penzeys is awfully good)
¼ cup of shortening
1 cup water
2 cups flour
2 cups sugar
3 eggs
½ cup buttermilk *

1 tsp baking soda
1 tsp vanilla

1. Preheat the oven to 350 degrees. Grease and flour a 9x13” pan.
2. Using a small saucepan, mix the butter, cocoa, shortening and water. Bring to a boil.
3. Whisk the flour and sugar soda in a large bowl. Add the butter mixture and mix well. Add the eggs, buttermilk, baking soda and vanilla and mix until combined.
4. Pour the batter into the greased and floured pan. Bake for 40 minutes at 350 degrees. The cake is done when a tester comes out clean.

*Buttermilk note:  I use SACO powdered buttermilk blend and whisk it with the dry ingredients. I then mix 1/2 cup of water with the eggs.

Topping for the “599 Day Cake”

Chop 8 ounces of your favorite dark chocolate in a mini chopper. Add 3 ounces of heavy cream and buzz until you have a curdled mess that stops the blades.
Spread this mixture on top of your cake when it comes out of the oven. The chocolate will melt and the top of your cake will look like curdled granite. Let the cake cool.

Sunday, April 22, 2007

The Food Families of France (March 2007)

The FoodFamilies of France as observed in Paris and Caen in March 2007

The Bagette Family, whose major constituents are big and small & long and short breads of all sorts, is probably the First FoodGroup of France. Its stars are croissant, pain au chocolat and almond croissant... Cousin to Bagette is The Crepe Family, with siblings Crepe and Gallette. Unlike their cousin Croissant, they are NOT served at breakfast (petite dejuner, if you will). They live side-by-side on menus in creparie (Houses of Crepes) which, unlike American McDonalds, which are strategically located within a few blocks of one another in large cities, there are streets in Montparnasse with 20 Maisons des Crepes on a block. You can get anything you want in a crepe, as long as it's sweet: my fave is simple: crepe, sugar and fresh lemon juice. You can get anything you want in a gallette, as long as it's savory. No, I didn't know that a gallette was a buckwheat pancake.

My personal favorite, The Pomme (apple) Family, is most useful, as it contains Calvados -- a spirit-lifting apple liquer -- which is either part of or the totality of the Tru Normande, the shot of Calvados served mid-meal in Normandy to create the "Norman Hole" in your stomach so that you can finish your meal. How civilized. A more festive and flexible Tru Normande can also be served in a shot glass: a scoop of apple sorbet topped with Calvados. There is Pomme in alcoholic apple cider which is the star of Kir Normande (cider with Cassis), which should be everyone's everyday refresher and has bumped the ever-popular Spanish sparkling wines from my house. The Pomme Family is also home to apple strudel, apple tart and tarte tatin, which can complete any meal and will signifcantly raise the stakes for snacks. France is also home to exquisite juices -- go to any grocery and find fabulous "Pomme" or "Pomme and Cerise" (apple and cherry) juices.

At Mark Bittman's recommendation, I found the World Headquarters of France's Falafal Family, L'as du Falafal on Rue des Rosiers in Paris. As always, Bittman is right. Put this on your list of "Foods I must eat in Paris." And after your Falafal, go across the street to Florence Finkelsztajn's Boulangerie for apple tart.


The Fruit and Frite Family is outstanding. There is apparently law prohibiting selling any fruit or veg that isn't perfect. I was in outdoor markets in Paris and in Caen, and in grocery stores in Paris, Caen, Bayeux and Honfleurs. The mushrooms are packed like little jewels; the radishes sit up and salute, and the strawberries and tomatoes were both beautiful and they tasted just like they were supposed to taste.

Clearly the French worship both Jambon and Fromage (ham and cheese). The variety of fresh and cured hams and sausage is overwhelming, and many more expert than I have made their careers on cataloging French cheese. I just ate.

Any vist to Caen requires careful examination of the Poisson and Fruits de Mers Families. I ate Coquilles St. Jacques, lobster, salmon and smoked salmon, and nothing was found wanting except that I wanted to be able to have fish that fresh every day of my life.


French folk take their food seriously and I am grateful for it. And I apologize for misspelling any French words.

Cooking Class Noodles: One roadmap - two recipes

http://susan-cooks.blogspot.com/2007/04/food-families-of-france-march-2007.htmlOne of the signs of spring in my kitchen is "Cooking Class!" with Amy, Erin and Rochelle, three grads of the U of Minnesota Law School. Amy and Erin trekked to St. Paul this weekend and we worked through five recipes that might not go together for a single meal, but each will contribute to both festive occasions and weeknight dinners.


Cooking Class Recipes: Kir Normande, Nigella Lawson's Lemon Lime Creams, Marian Burros' Plum Torte, and two rice noodle stir frys from Cook's Magazine's Complete Book of Pasta and Noodles (Clarkson, 2000).


KIR NORMANDE Kir Normande is a sterling representative of the Pomme (apple) Family, my favorite of the FoodGroups of FranceThe most accessible way to recreate my recent trip to Paris and Normandy, it requires some zesty alcoholic apple cider (right now I prefer French, but I suspect that in a few months, I'll go right back to Woodchuck, my favorite American label) and Cassis. Yes, this is the Norman version of Kir Royale, and it perks up everything. Also try a non-alcoholic version: non-alcoholic cider with a splash of pomegranate.


MARIAN BURROS' PLUM TORTE Why don't you own The Best of DeGustibus (Simon and Schuster, 1988)? Marian Burros wrote about food for the NY Times for years, and many of her columns were collected this book. It is a window on how we shopped and ate and thought about food during the 80s, and it is full of terrific recipes, including the famous Plum Torte, which she reports was the most requested recipe ever published by the Times. And why not? It is perfect: it's simple; it's reliable; it's expandable; it freezes; and it never, ever disappoints -- except, perhaps in the short time that it sits on the table or on the counter before it disappears. It is a cookie dough that wraps itself around stone fruits and transforms them.


If you freeze torts in springform pans, pop off the metal bottoms and triple wrap the torts. A tort from your freezer puts the flavors of summer on your table in the middle of the winter. Double the batter ingredients to fill a 9x13" pan.
  1. Cream 1 cup sugar and 1/2 cup unsalted butter. Mix (stir well or sift) 1 cup flour, 1 tsp baking power and a pinch of salt. Add to the sugar and butter. Add two large eggs to the batter. Spread it into a 9" springform pan or other round or square pan.
  2. Top with 24 halves of pitted Italian or other plums or stone fruits. Sprinkle with cinnamon, sugar and lemon juice. (I have often forgotten to do this and no one noticed.)
  3. Bake at 350 for an hour. If baking from frozen, bake for about 30 minutes at 300 degrees.

NIGELLA LAWSON'S LEMON -LIME CREAM (New York Times, April 2, 2003, p. D3) We used it to sauce the torte, which was gilding the lily. Lemon-Lime Cream is outrageously sinful, ridiculously easy and always accessible because lemons and limes, cream, sugar and eggs are ALWAYS in the grocery store.

THIS IS STUPID EASY. In a large bowl or in a blender: mix the zest and juice of 2 lemons and one lime, 1-1/2 cups sugar, 6 large eggs,1-1/4 cups heavy cream. Cover and refrigerate for between 2 to 48 hours. Bake at 300 degrees in six one-cup ramekins placed on top of a dish towel set in roasting pan. Pour hot water half way up the sides of the ramekins. Check them at 45 minutes: they should be just set with the centers slightly wobbly. Remove from the water and allow to cool. [Tongs are a great tool for this.] Serve at room temperature or cover with plastic wrap and refrigerate.


STIR FRIED RICE NOODLES two ways: One roadmap and two recipes from Cook’s Magazine Complete Book of Pasta and Noodles
 

The editors of Cook's Illustrated focus so closely on technique that even novice cooks can move through their recipes fearlessly. Although I own most of their books, it's this one that I turn to again and again because they tell me how to do it -- whatever it is. Thanks, Cook's.


It took about two minutes of careful parsing to realize that except for a few ingredients, these recipes were identical. After some cheerful chopping (with Kir Normande as inspiration), with two of us at the stove and one navigator/timer we were able to get both of these dishes to the table in under ten minutes. You could probably stir fry these on a giant wok on a high-heat outdoor gas grill.


The instructions in both recipes are identical in numbers 1 and 2 -- boil noodles and heat the oil in the pan. In number 3, you are guided to add the particular ingredients for for stir frying; and in number 4 you add the noodles and the sauce ingredients.

Stir-Fried Rice Noodles with Shrimp, Pineapple and Coconut Cream (p. 430)

12 oz thick rice noodles
salt
¼ cup peanut oil
8 oz shrimp, peeled and coarsely chopped
4 medium garlic cloves, minced
1 T minced fresh ginger
1 medium jalapeno or small fresh hot chili
3 T fish sauce
1 T sugar
½ c light coconut milk
1-1/2 c fresh diced pineapple

  1. Boil 4 quarts of water; add noodles and 1 T salt. Cook until noodles are tender but not mushy (4-5 minutes). Drain and toss with 2 T oil in a large bowl.
  2. Heat a 12-14” nonstick skillet over high heat for 3-4 minutes. Add remaining 2 T of oil and swirl until it coats the bottom of the pan. Heat until it starts to shimmer and smoke.
  3. Add the shrimp and cook, stirring until bright pink (1 min). Add the garlic, ginger and chili and cook, stirring until fragrant (30 seconds).
  4. Add the fish sauce, sugar, coconut milk and pineapple. Stir to combine (30 seconds). Add the noodles and cook, pulling them apart with spring-loaded tongs or 3 forks, tossing to coat with sauce. Add salt if necessary.


Stir fried rice noodles w/ coconut curry sauce (p. 431)

12 oz thick rice noodles
salt
¼ c peanut oil
1 medium red bell pepper, stemmed, seeded, diced small
½ # sugar snap peas, stringed (we used green beans)
4 c shredded Napa cabbage
4 medium cloves of garlic, minced
1 T minced fresh ginger
2 T soy sauce
1 T fish sauce
1 T sugar
½ c light coconut milk
2 T curry powder (we used Penzey's Sweet Curry; I would mix 1T Sweet and 1T Hot)

  1. Boil 4 quarts of water; add noodles and 1 T salt. Cook until noodles are tender but not mushy (4-5 minutes). Drain and toss with 2 T oil in a large bowl.
  2. Heat a 12-14” nonstick skillet over high heat for 3-4 minutes. Add remaining 2 T of oil and swirl until it coats the bottom of the pan. Heat until it starts to shimmer and smoke.
    Add bell pepper and stir fry until slightly softened (30 seconds). Add the peas or beans and stir fry until tender (1 minute for peas, 2 minutes for beans). Add the cabbage and stir fry until wilted (1-1/2 minutes). Add the garlic and ginger and cook, stirring until fragrant (30 seconds).
    Add the fish sauce, sugar, coconut milk and curry powder. Stir to combine (30 seconds). Add the noodles and cook, pulling them apart with spring-loaded tongs or 3 forks, tossing to coat with sauce. Add salt if necessary.

Sunday, February 25, 2007

Not "Pimento" Cheese: a great party food

Pimento Cheese is a Southern food, and in grocery stores south of the Mason Dixon Line, you can buy it in great tubs from competing purveyors.


I'm not entirely sure that Pimento Cheese was part of my childhood, although my Mother was fond of cream cheese and stuffed olive sandwiches. Nonetheless, I claimed the taste memory at my 35th high school reunion (Northwestern High School, Hyattsville, MD, Class of '67.) At a small gathering during the weekend, Pam Zirkle pulled out a big bowl of her Mom's Pimento Cheese that had been hand-delivered from Virginia. I couldn't get enough, but, uncharacteristically, didn't ask for the recipe.


Armed with the taste memory and determination to make this one of My Party Foods, I found a recipe in the ever-reliable Jean Anderson's American Century Cookbook. Traditionally, of course, traditional Pimento Cheese contains actual jarred pimentos, however, I couldn't find them in the grocery store, and again, uncharacteristically, failed to ask. I settled on roasted red peppers and have never looked back.


This is great party food. Make it two or three days in advance. Set it out in bowls surrounded by Wheat Thins (my favorite) or vegetables, and voila! It will disappear.  


Pimento cheese makes wonderful sandwiches, it thins to sauce pasta, and it gives new life to tomato soup.  Lacking roasted peppers, I have made it with jarred hot giardiniera.


Not "Pimento" Cheese, adapted from American Century Cookbook, by Jean Anderson, p. 353.

1 pound 16-month old Cabot White Cheddar (or the white or yellow sharp cheddar of your choice)
1 8-ounce jar of roasted red peppers, rinsed and drained.
3 T minced fresh onion or 1 T dried onion
2/3 cup light Miracle Whip (or the mayo-like product of your choice)
2 tsp brown mustard
1/2 tsp (or more) fine ground black and cayenne pepper
4 tsp (+ or -) milk or cream (non-fat milk to cream, your choice)


IN THE FOOD PROCESSOR
1. Grate the cheese. Remove it to a large bowl.
2. Process the remaining ingredients EXCEPT the milk.
3. Return the cheese to the processor and add enough milk to make a thick paste.
4. Chill overnight.
5. Serve at room temperature with Wheat Thins, in celery sticks, as a sandwich spread or on pasta. Spread on split or small rounds of baguette and broil.

Saturday, February 24, 2007

Indian Spiced Cauliflower & Potatoes

When you've clipped a recipe and made it enough that it is tattered, a sensible cook find a more permanent place. For more than a decade, mine was a lovely little paper notebook, a gift from my cousin Joanne. I used it for recipes from friends and family, newspapers and magazines, and for original recipes that I worked out through trial and error. And on one sad day, I tossed it out with newspaper recycling. I still sigh -- especially for the Thai Chili Noodles -- but never mind. I replaced it with an 8-1/2 x 11 leather-bound book. It will never go out with recycling. One of its treasures is Indian Spiced Cauliflower and Potatoes.


This dish calls on your chopping skills -- or it will give you an excuse to practice on cheap ingredients. And please, get a good knife and take care of it. If you're unsure about your knife skills -- practice. Years ago I took a terrific "Knife Skills" class at the St. Paul Cooks of Crocus Hill. I was cranky after the class because I wanted to chop for three hours instead of watching, listening and getting the basics. The teacher was right, though. Like all skills, this one requires practice. I took that class in the Spring, and that summer my Onion Relish won a blue ribbon at the Minnesota State Fair. Why? Because it tasted great and because after chopping more than 20 pounds of onions, the pieces were perfect.


I have adapted this traditional Indian dish, offering the option of adding of  very untraditional onions and carrots and increasing the spices. This dish has it all: it is good hot, cold or at room temperature; it is astonishingly low in fat, and amazingly intense in flavor. Add these spices to your spice rack -- you'll use them often. If you have a very sturdy stainless steel roasting pan, this is the time to use it!

This is a two-part recipe: roast the vegetables in the oven, then add them to a spicy mix on top of your stove.  


Adapted from Gourmet (Feb. 2004, p. 135)

FOR THE OVEN
1 head of cauliflower, cut in 3/4" florets
1-1/2 # potatoes (Idaho or Yukon), cut in 3/4# cubes)
1 medium onion, cut in 1# chunks (optional)
1/2# carrots, cut in 1# chunks (optional)
3 T vegetable oil
1/2 tsp cumin seeds
1/4 tsp crushed red pepper
1/4 tsp salt

1. Preheat the oven to 475. Preheat the roasting pan at the same time.
2. Toss the cut vegetables with 3 T oil and 1/2 tsp cumin seeds and 1/4 tsp crushed red peppers.
3. When the oven is hot, put the vegetables into the hot roasting pan. Bake for 20+ minutes, stirring every ten minutes, until the potatoes are tender and the cauliflower has brown spots.

FOR THE TOP OF THE STOVE
2 T vegetable oil
1 medium onion, finely chopped
2 cloves of garlic, finely chopped (or dried minced garlic)
2 tsp minced fresh jalapeno (or serrano for more heat) peppers with seeds
2 tsp minced fresh ginger
1 tsp ground cumin
1/4 tsp crushed red pepper (optional)
1/2 tsp ground coriander
1/4 tsp turmeric
1/4 tsp cayenne pepper
1/2 cup water

1. In 2 T oil, cook the onion, garlic, jalapeno (or serrano) peppers and ginger for 8-10 minutes.
2. Add the cumin, red pepper (optional), coriander, turmeric and cayenne, and cook for 2 minutes.
3. Stir in the water, add the vegetables from the oven. Stir well, and cook covered for 5 minutes. Stir once or twice, and serve with lemon wedges.

Friday, January 26, 2007

The ONLY Chocolate Pound Cake You'll Ever Want: Thank you, Judith Olney

Favorite cookbooks open automatically to favorite recipes, and my copy of Judith Olney's The Joy of Chocolate (1982, Barron's Educational Series) opens to page 68 -- CHOCOLATE POUND CAKE.

I have made it over and over again and it has never failed, and never failed to please. It travels incredibly well: across town, in my luggage around the country, and, handed frozen to the lovely people at FedEX, it has gone overnight to California and to Alaska. I'm told that it is a good keeper -- that's not been my experience because it's never been on the counter for more than a day. It is the CHOCOLATE POUND CAKE that every pound cake wants to be when it grows up.

But there is more to this cookbook than just the Fabulous Pound Cake. The photographs are riveting. The cover photo of CHOCOLATE CABBAGE CAKE is breath-taking. I will make this someday -- sponge cake halves sandwiched with whipped cream, surrounded by chocolate leaves molded from real cabbage leaves. When will I do this? Not soon, but someday.

Her preface is thorough and helpful, including "Working with Chocolate," "Working with cream," "Working with Eggs," and excellent advice on equipment. She presents concise conversions for liquid, imperial, and metric liquid and volume measures. Best of all, if you have ever puzzled over Nigella Lawson and her gas mark oven temperatures, the gas mark/fahrenheit/centigrade conversion table is on page xxiv.

SOUR CREAM MARBLED POUND CAKE, is a gem, but for me, the most fun to be had from a cookbook is from Judith Olney's GEODES. If you have ever made truffles or love to play with clay, this is your recipe. With GEODES, you make dark and white truffle mixtures and then wrap them one around the other, light over dark over light. Part of the fun is fiddling with the chocolate, but the best part is watching your pals cut into small or large GEODES and finding multiple layers of chocolate. The GEODES in the her photo are pristine and precise. Mine are rough and uneven -- more like a something dug from the earth. Next time, though, I'm tinting the white chocolate purple and trying to persuade my pals that these are Amethysts.

CHOCOLATE POUND CAKE
Adapted ever so slightly from Joy of Chocolate
I use a large tube pan from Bridge Kitchenware. Mrs. Bridge told me that her husband designed it for Maida Heatter. Hats off to all of them!

1 cup cocoa (I use Penzey's Dutch Process which is 24% butterfat)
2 cups sifted all purpose flour
1/2 tsp baking powder
1 tsp salt
2 T instant espresso (or other instant coffee powder)
3 sticks unsalted butter at room temperature
3 cups granulated sugar
2 tsp vanilla extract (Cook's Magazine says that imitation vanilla is fine in recipes like these where you can't tell the difference)
5 eggs at room temperature
1 cup buttermilk (I use SACO Cultured Buttermilk Blend powder and sift the 4 T of powder with the dry ingredients in step 2)
1/4 cup water ( or 1-1/4 cup water if you have used buttermilk powder.)

1. Preheat the oven to 325. Butter a tube pan and, instead flour, dust with cocoa. Presto! NO ugly white spots.

2. Sift the cocoa, flour, baking powder, salt and espresso powder. Set aside.  If using buttermilk powder, sift with these ingredients.  Having an electric sifter makes sifting three times to incorporate everything a snap.

3. Using a stand mixer, cream the butter for two minutes. Add the sugar in a slow stream and then beat on high for five minutes. Slow the mixer and add the vanilla. Add the eggs, one at a time, beating briefly after each addition.

4. Add the dry ingredients alternately with the buttermilk and water mixture or plain water if you have used buttermilk powder. Scrape down the sides and mix by hand at the end, making sure to catch any unmixed batter.

5. Pour into the pan, and bake for 80 minutes, turning the pan half way through. Check with a cake tester at 75 minutes. The cake is done when the tester comes out clean.

6. Rest the cake in the pan for 20 minutes, then unmold onto a rack.

7. To freeze, cool completely and double wrap in plastic and then double wrap in foil.

Thank you, Judith Olney.


Sunday, January 21, 2007

Really spicy molasses cookies

It took a while for me to embrace spicy food for dinner -- my Mother's first attempt at Chicken Creole in the early 1960s called for 1/8th tsp of cayenne, and for years in her house, cayenne was doled out of that same can, grain by grain.

But I always loved spicy gingerbread -- whether cake-like or sludgy in the pan, as gingerbread men or especially the crispy Moravian ginger cookies -- I loved the combination of molasses and spices, and I always willing to double the spice.
Except for one lovely afternoon with some friends and a Spritz-making apparatus, I hadn't made a cookie in decades, but I was recently brought back to the fold.

Bridget Lancaster, the wonderfully inventive, creative and knowledgeable cook, well-known to fans of America's Test Kitchen, wrote about "Joe Froggers," a 200-year-old cookie made with seawater and rum in COOK'S COUNTRY (February-March 2007, p 9). She tracked the cookie's history and worked out the kitchen science, so necessary because this recipe has no eggs. Some of its special flavor comes from a mixture of rum and salt (no seawater in the 21st century). This very flat cookie gets it nominal lift from baking soda mixed with molasses, which almost doubles in volume -- putting on a wonderful show for children of all ages. Its texture -- just crisp around the edges if you bake it long enough, comes from the proportion of molasses to sugar.

Although her version is well-spiced, it wasn't enough for me, so I increased the amount of ground spices, added cayenne and candied ginger. Also, I am not patient enough to chill now, roll and bake later. If I'm going to have a cookie every two decades, I want it now, and these are terrific drop cookies made with fresh dough. In the interest of science, however, I formed dough logs and froze them for slice-and-bake cookies. Wrap the rolls in plastic and refrigerate or freeze.

One more really good thing about this recipe for people who can't resist raw cookie dough: with no eggs, you may nibble away without fear of salmonella.
The traditional "Joe Frogger" is huge -- the Cook's Country version makes just two dozen. Depending on the size of your drop, the width of your dough logs and the thickness of your slices -- well, I have no idea how many dozens you might make.

Super Spicy Molasses Cookies (adapted from Cook's Country)

Useful tools: 2 cup measuring cup; parchment or silicon mats for baking

1 cup dark (not blackstrap) molasses
1 tsp baking soda
1/3 cup rum (dark is good, light is fine if that's what you have)
1 T water
1-1/2 tsp salt
3 cups all purpose flour, plus some for creating dough logs
1 tsp ground ginger
3/4 tsp ground allspice
1/2 tsp ground nutmeg (fresh ground, please)
1/4 tsp ground cloves
1/16 tsp ground cayenne
1 c sugar
2 T candied ginger, minced or processed very fine with the sugar
1 stick (8 T) butter, softened

1. In a two (or larger)-cup liquid measure, with the baking soda at the bottom, mix the soda and molasses. Set aside for about 15 minutes. It will almost double in volume, foaming in a nice way.
2. Dissolve the salt in the rum and water.
3. Whisk the flour and the dry spices.
4. On medium speed, beat the butter, ginger and sugar for four minutes.
6. On low speed, add the rum mixture -- it will look curdled. Then add the flour mixture and molasses alternately: three additions of flour and two of molasses. This is a stiff and sticky dough that may require finishing by hand.

BAKING: 375 degrees on a parchment or silicon-mat covered baking sheet.


7. Slice and bake: Form the dough into logs as wide or as narrow as you like. Cover with plastic and refrigerate or freeze until you're hungry. Sice, then bake 8-10 minutes, or until the tops are crakced. Cool in the pan for 5 minutes and the move to a rack (unless you've already eaten them). The thinner the slice, the more likely that your edges will be crisp.

8. Drop cookies #1: drop by tablespoon, and bake for 8 minutes, or until the tops are cracked. Cool in the pan for 5 minutes and then move to a a rack; OR Drop cookies #2: chill the dough for 1-24 hours in a bowl covered in plastic wrap. Drop by tablespoon and bake for 8 minutes or until the tops are cracked. Cool in the pan for 5 minutes and then move to a rack.

Tuesday, January 09, 2007

Spinach Balls - party food from your freezer

I've had Spinach Balls in my freezer for about 35 years. Why? Because they're easy to make in double and triple batches and because people love them. By the time the drinks are made, and guests have relaxed, Spinach Balls are out of the oven. If you're in a tearing hurry, they're out of the microwave in two or three minutes. Pour out some honey mustard for dipping, and you're on!

I believe that I clipped the original recipe from Bon Appetit. This one is adapted from a handwritten copy that my sister Elaine made from a version that I read to her over the phone that was in a small paperbound recipe journal that I'd collected over 20 years that I tossed out with recycling in 1998. Arrghhh! I replaced it with a full-sized, leather-bound journal that's too heavy to be mistaken for newsprint.

This is a snap with a food processor.

SPINACH BALLS - Makes about 40

2 boxes, frozen chopped spinach, thawed, drained,squeezed dry and separated into threads
5 oz grated Parmesan or Romano cheese
1 stick of butter, melted
1 7-oz bag of bread crumbs or seasoned croutons
3-4 scallions, cut in 2-inch lengths
2 eggs
Optional: garlic, hot peppers (flakes or whole dried), other herbs and spices of your choice

1. Grate the cheese and pulverize the croutons in the food processor. Remove to a large bowl.
2. Add the melted butter to the cheese and crouton mixture.
3. Process the eggs and scallions (and optional garlic and/or hot peppers) until the scallions are barely identifiable. Add to the cheese and crouton mixture and mix well.
4. Separate the spinach into threads so that they will mix easily into the cheese and crouton mixture. If you add all the spinach at once, you will spend 20 extra minutes mixing it into the cheese and croutons.
5. Use a tablespoon measure, then roll the balls, compressing them slightly. Yes, it would be faster to use an ice cream or cookie scoop, but you'd have to go back and roll them together by hand, anyway.
6. Freeze on a sheet of parchment or a silicone mat. Store in a plastic freezer bag.
7. Bake at 350: 15-20 minutes unfrozen; 20-25 minutes from frozen.

Monday, January 01, 2007

Bittman's Bread Breeds Fine French Toast

Happy New Year!

I have had French Toast three times in the last 20 years and, not coincidentally, all three were in the last three weeks. Why? Mark Bittman's Bread, which I have already discussed, is the key to both savory and sweet breads that make Fine French Toast.

Savory: To the basic recipe (3 cups flour, 1/4 tsp active dry yeast, 2 (yes two) tsp salt), add 1/2 cup freeze dried chives (from Penzeys, if you need a source  and 1/4 tsp dried red chili flakes.

Sweet: To the basic recipe (3 cups flour, 1/4 tsp active dry yeast, 2 tsp salt), add 1 tsp sugar, 1 tsp cinnamon, and 1 cup of the dried fruit of your choice. My choice was dried cherries, but had I been able to find raisins that appeared to have had a life in this decade, I'd have used raisins, also. One caveat: the cherries or raisins on the outside of the dough will burn into crispy critters on the sides of your cast iron casserole. Soak, scrub and make more bread!

French Toast: On the off chance that you have leftover bread, or if your plan is to make French Toast, leave the loaf out unwrapped overnight. Slice the bread as thick or thin as you like. Beat 1-2 eggs per person with salt, pepper, cream (for decadence, if available) or milk, and your choice of herbs and/or hot sauce for savory or sugar and cinnamon (or nutmeg or 5-spice...) for sweet. Soak the slices, turning once or twice, until most of the liquid is absorbed. Heat some butter in a pan (non-stick makes less mess), drop the slices into the butter, reduce the heat to low and cook about 5 minutes per side -- more if you like it crisp, less if you like your eggs and toast runny.

One more reason to bake bread every day. Thank you -- hats off again -- to Mark Bittman!

Saturday, December 23, 2006

Really hybridized corn


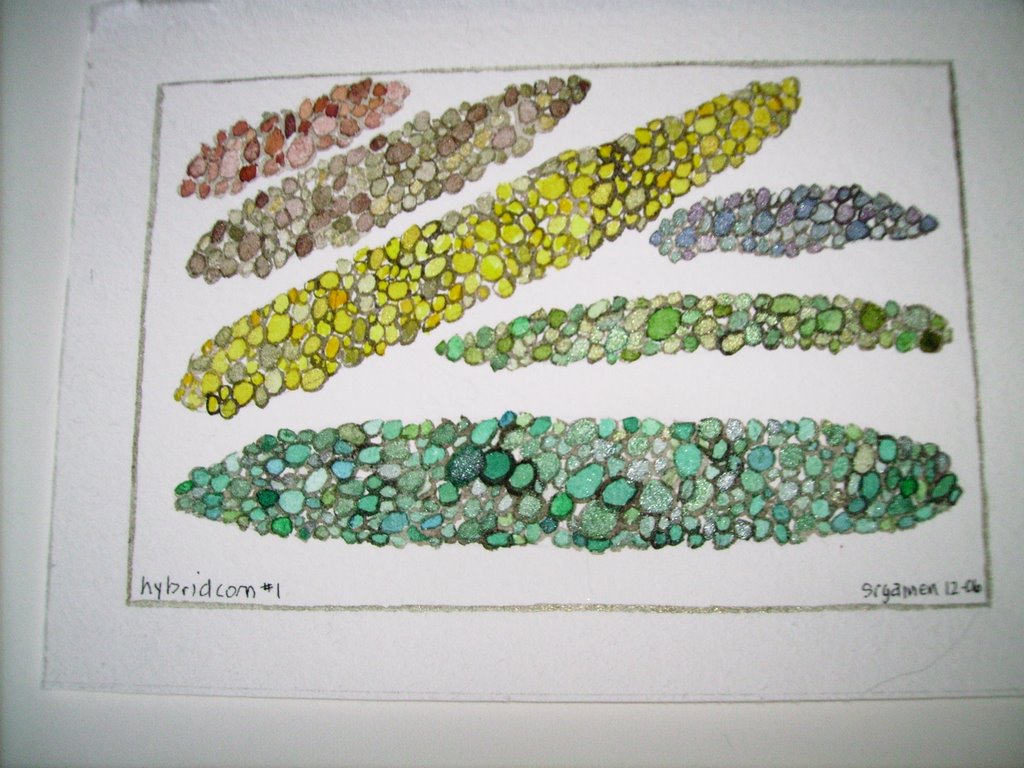
Really really hybridized corn - a very early nanoscape...I promise not to give up painting to explore plant genetics... If, however, you are interested in homicidal plant geneticists, look for Emma Lathen's Green Grow the Dollars (1982, Simon and Schuster; 1983 Pocket Books). "Emma Lathen" is/was two women who met in the early 1960s in a library at Harvard. One became a lawyer, the other an agricultural economist. Together, they used the device of the Trust Department of the Sloan Guaranty Trust, the third largest bank in the world, and its Senior Vice President, the supremely unflappable John Putnam Thatcher, to explore literate and civilized murder and mayhem in a wide swath of industries. The gore is always off-stage, and they assume that you know that "defenestration" means throwing yourself out the window. It's hard to pick favorites, but those set in the automobile, candy, ice hockey, home-delivered fried chicken and oil businesses come quickly to mind. They also wrote together as R.B. Dominic, with just five books featuring Ben Safford, a Congressman from Ohio. Using the power of Congressional investigation, they explored Supreme Court appointments, defense contracting, wildly abusive medical professionals (before it was "normal" for doctors to testify against one another in malpractice suits), and my personal favorite, Murder Sunny Side Up (Paperjacks, Ltd., 1985), which centers on a process for producing shelf-stable "fresh" eggs. Sadly, the Dominic books are out of print, but you can often find them used.

Saturday, December 16, 2006

Cashew Brittle and the Gift of the Candy Thermometer


If you give the gift of five pounds of candy, the recipient will be sick for a week.
However, if you give the gift of a Candy Thermometer, the recipient will be able to make
jam, jelly, Italian meringue, caramels and Cashew Brittle -- and you may reap your just rewards (or just desserts.)
Whether you are playing an instrument or playing golf or playing the radio, using the best tools and equipment makes the activities easier and more pleasant. You can, of course, make this recipe without a candy thermometer by learning the rules of "soft-crack" and "hard-crack" stages of boiling sugar, and you can get by without either parchment paper or silicone mats, but you will have to deal with the messy cleanup after having to buttered the baking sheets. Your choice. You are, after all, the boss of you.

  • To double or not to double? With the Bergin Nut Company in my back yard, I will always buy cashews in five-pound bags, and I will also always roast all of the nuts because roasted nuts are better to my taste. Extras go in the freezer.
  • Would I double the brittle recipe or make it in small batches? Until I have factory-style equipment (giant sugar-stirring machinery), I'll continue to make small batches.
  • Would I leave boiling sugar unattended for any length of time? No way. Turn on your I-pod, the TV or the radio, or grab a book -- but stay nearby. Boiling sugar is really really hot, and boiled-over sugar makes an incredibly awful mess.

CASHEW BRITTLE

EQUIPMENT:

3 qt saucepan
2 large rimmed baking sheets
parchment paper or silicon baking mats
silicon spoon or spatula
clip-on candy thermometer

@@@@@@

2 cups of sugar
1 cup of vanilla-flavored light corn syrup
1/2 cup water
1 cup (2 sticks) of unsalted butter
scant 1/8 tsp dried red pepper flakes (OPTIONAL)
3 cups roasted (not salted) cashews or cashew pieces
1 tsp baking soda, sifted

1. Roast cashews: Heat the oven to 350 (regular or convection oven). Cover baking sheets with parchment or silicone and spread the cashews in one level. Bake, stirring every 10 minutes, until the nuts are toasted to your satisfaction.

2. Make caramel: In a 3-quart saucepan, mix the sugar, corn syrup, water. Bring to a boil and stir until the sugar has dissolved. Add the butter and optional red pepper flakes. When the butter has melted, clip your CANDY THERMOMETER to the pan. Reduce the heat to medium and boil at a moderate rate, stirring occasionally, until the mixture reaches 280 degrees (soft-crack stage). This might take 30-40 minutes.

3. Cook caramel and cashews: Add the cashews and stir. When they first are in the pot, the mixture will seize up because you have lowered the temperature and the sugar is angry. Keep stirring to loosen it up, and then stir often until it reaches 300 degrees (hard-crack stage). This may take another 20 minutes.

4. The Mixture Foams: When the mixture reaches 300 degrees, remove it from the heat and add the baking soda. The mixture will foam. Keep stirring until the whole mixture has achieved foaminess. Quickly, pour the mixture onto two parchment or silicon-covered baking sheets. Spread as the mixture as thinly as you can while it is still hot.

5. Cut it up! When it has cooled a bit -- still really too hot to handle -- lift one of the planks of brittle onto a cutting board sitting inside a rimmed baking sheet (which will capture the flying brittle shards). As soon as you can, begin to cut the brittle into strips and then into bite-sized pieces. Store air tight.


Tuesday, December 12, 2006

Spiced Pecans

My friend Kimm Walton (author of Guerilla Tactics for Getting the Legal Job of Your Dreams), "introduced" me to Ann Hodgman several years ago when she sent me a copy of Beat That! (1995, Chapters Publishing, Ltd., Shelburne, VT). Kimm and I have discussed going to Ann's house to worship in her front yard in gracious grateful thanks for SPICED PECANS. This book is full of other fabulous things, including Snow Pea Salad (best on earth!), Cranberry Chutney, Ginger Honey, and Ginger Squares (a very pleasant surprise for someone grabbing a Blondie.)

But on to the pecans...I first made these for a party, dutifully following the recipe and making one pound. The guests inhaled them until there was but one left. It was on the floor and people were circling, but one of my cats batted it away. Never again have I made fewer than 5 pounds, which freeze beautifully, becoming pantry staples. If you must make fewer than 5 pounds, do the math yourself.

This is a two-day or early a.m. and then late p.m. project. Don't be intimidated. All you have to do is boil water, divide by four, turn on the oven, stir the nuts while they bake, and then toss them with spices when they are brown.


SPICED PECANS (adapted from Beat That!)

Day 1 - STEP 1: Boil the pecans

Day 1 - STEP 2: Soak the pecans at room temperature
Day 2 - STEP 3: 12-24 hours later, bake at 350 degrees (conventional or convection),stirring every 5-10 minutes until they are deep deep brown.
Day 2 - STEP 4: Toss with spices

INGREDIENTS AND TOOLS for Step 1 (boil)
5 pounds of whole raw pecans, divided by four
a large pot of boiling water
a colander for draining


INGREDIENTS AND TOOLS For Step 2 (soak) 
4 bowls that you can cover with plastic
2 cups white sugar, divided by four
2 sticks of butter, divided by four
8 T light corn syrup, divided by four
4-8 T vanilla

INGREDIENTS FOR STEP 4
Mix the following in a small bowl, and divide by four.
1-1/2 tsp salt
1-1/2 tsp ground coriander
1-1/2 tsp ground cinnamon
1-1/2 tsp fresh grated nutmeg
1-1/2 tsp ground allspice
1-1/2 tsp fresh ground pepper (white pepper is nice)

1. STEP 1 BOIL Boil the water. Boil each bowl of pecans for 1 minute. 


2.  STEP 2 SOAK  Drain carefully, and toss with the melted butter, sugar, corn syrup and vanilla. Store covered at room temperature.

3. STEP 3 BAKE 12-24 hours later...In a 350 degree oven (or, better yet, in a 350 degree convection oven), bake each bowl of pecans until they are quite brown. Ann Hodgman says to aim for "deep, mahogany brown." Less than that and they won't be crisp. This goes quickly with two baking sheets at a time.  A word to the wise: do not walk away from this task, and do not imagine that you can do this without stirring.

4. STEP 4 TOSS Mix the spices and divide into four small bowls. When your nuts are brown, return them to their soaking bowls and toss with 1/4 of the spices. Cool on a baking sheet. Store in zipper bags in the freezer.

Notes:

1. Why don't you have four bowls?
2. Bake these on the weapons-grade rimmed baking sheets that come from restaurant supply houses (Hockenbergs in the Twin Cities).
3. Buy your nuts from a wholesaler (Bergin Nut Co., in the Twin Cities) or from a co-op.

4. This is a surprising flexible recipe. I have mistaken curry for cinnamon and no one complained. It was an honest mistake and they are near to one another in my alphabetically organized spice rack, a habit leftover from years of representing Spice Islands when I worked for a San Francisco-based food broker.)